Constructing a simple side table with hairpin legs: a tutorial

Introduction: The Perfect Side Table for Singapore Homes

```html

So, you've finally got your own place in Singapore, eh? Whether it's a cozy BTO flat or a newly renovated condo, setting up your home sweet home is exciting... but can also be a bit daunting, right? Especially when you're trying to balance style with space and, of course, budget. Finding the right furniture in Singapore can feel like a real challenge, but don't worry, confirm can! Let's talk about a simple project that'll add a touch of personality and practicality to your living space: building your own side table with hairpin legs.

Why a side table, you ask? Well, think about it. How many times have you wished you had a convenient spot to place your kopi while relaxing on the sofa? Or a stylish perch for your plants next to the window? A side table is that unsung hero of the living room, bedroom, or even the balcony. And building one yourself? That’s where the magic happens. You get to customize it to perfectly fit your needs and style, without breaking the bank. Plus, there's something incredibly satisfying about creating something with your own hands. This isn't just about furniture; it's about adding a personal touch to your space, one that reflects your unique taste and resourcefulness.

This guide is designed for first-time homeowners and DIY newbies. Don't worry if you've never picked up a power drill before. We'll walk you through each step, from choosing the right materials to assembling your very own stylish and functional side table. We'll keep it simple, focusing on affordability and ease of construction, so you can create a piece you'll be proud to show off. And who knows, maybe this will be the start of your DIY furniture journey!

Why Choose a DIY Side Table Project?

Okay, let's be real. Singapore isn't exactly known for its cheap furniture. And while there are plenty of furniture stores in Singapore offering a wide range of options, finding that perfect piece that fits both your style and your budget can feel like searching for a needle in a haystack. That's where the beauty of DIY comes in. Building your own furniture, especially something as simple as a side table, offers a whole host of benefits.

First and foremost: cost savings. Buying a pre-made side table, especially one with those trendy hairpin legs, can easily set you back a few hundred dollars. But by building it yourself, you can significantly reduce the cost. You're mainly paying for the raw materials, which you can source from local hardware stores or even repurpose from old furniture. Think of it as a budget-friendly way to get exactly what you want.

Then there's the customization aspect. When you buy furniture off the shelf, you're limited to the available styles, sizes, and finishes. But when you build your own, you have complete control. Want a round tabletop instead of square? No problem. Need it to be a specific height to fit perfectly next to your sofa? You got it. Want to stain it a unique color that complements your existing decor? Easy peasy. This level of customization allows you to create a piece that truly reflects your personal style and seamlessly integrates into your home.

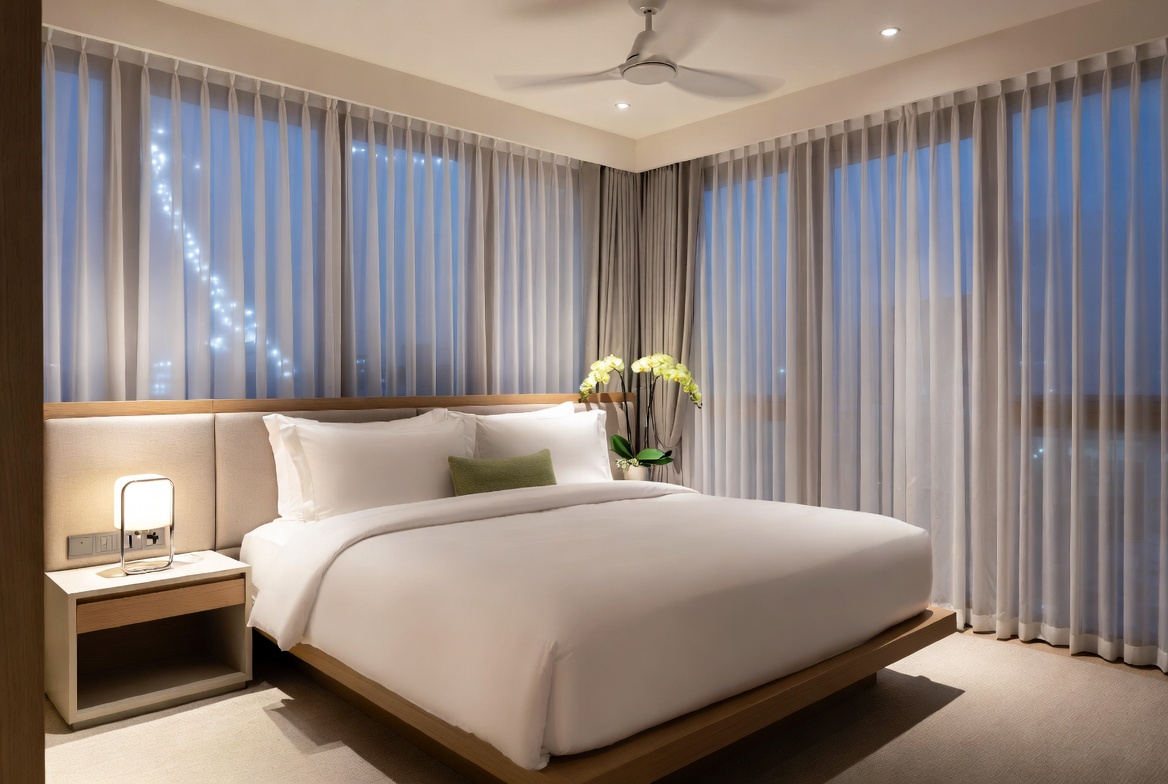
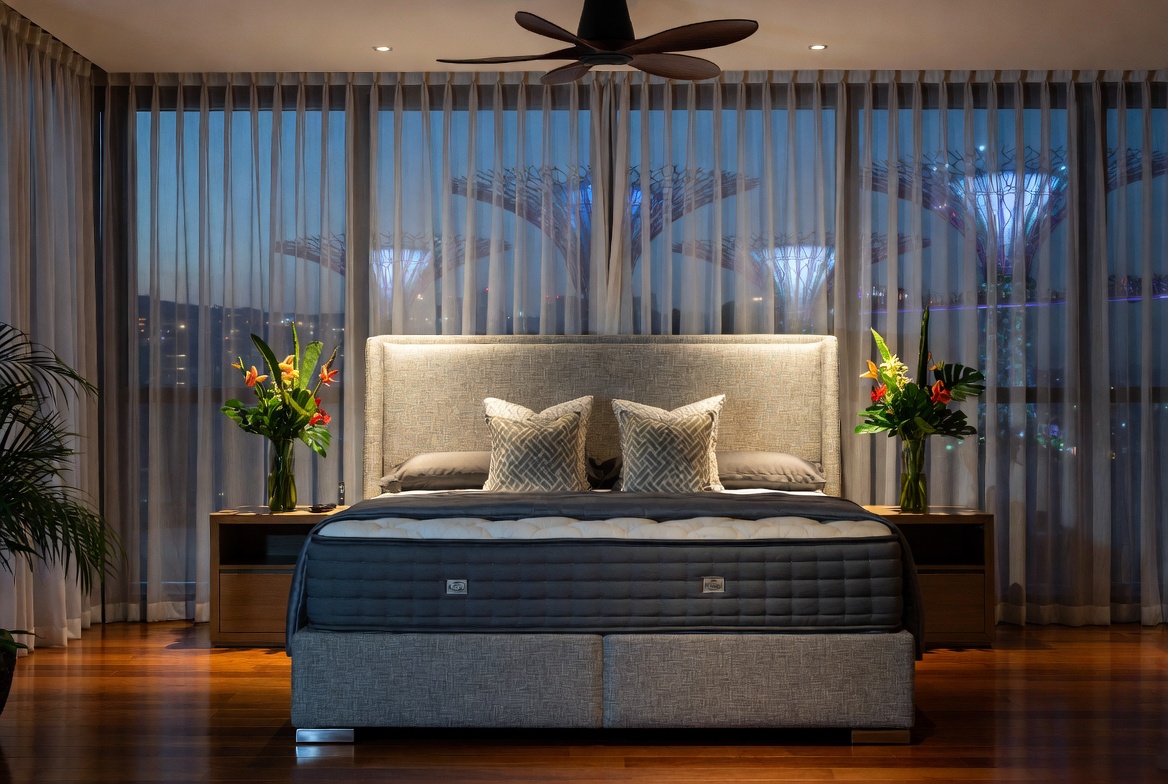
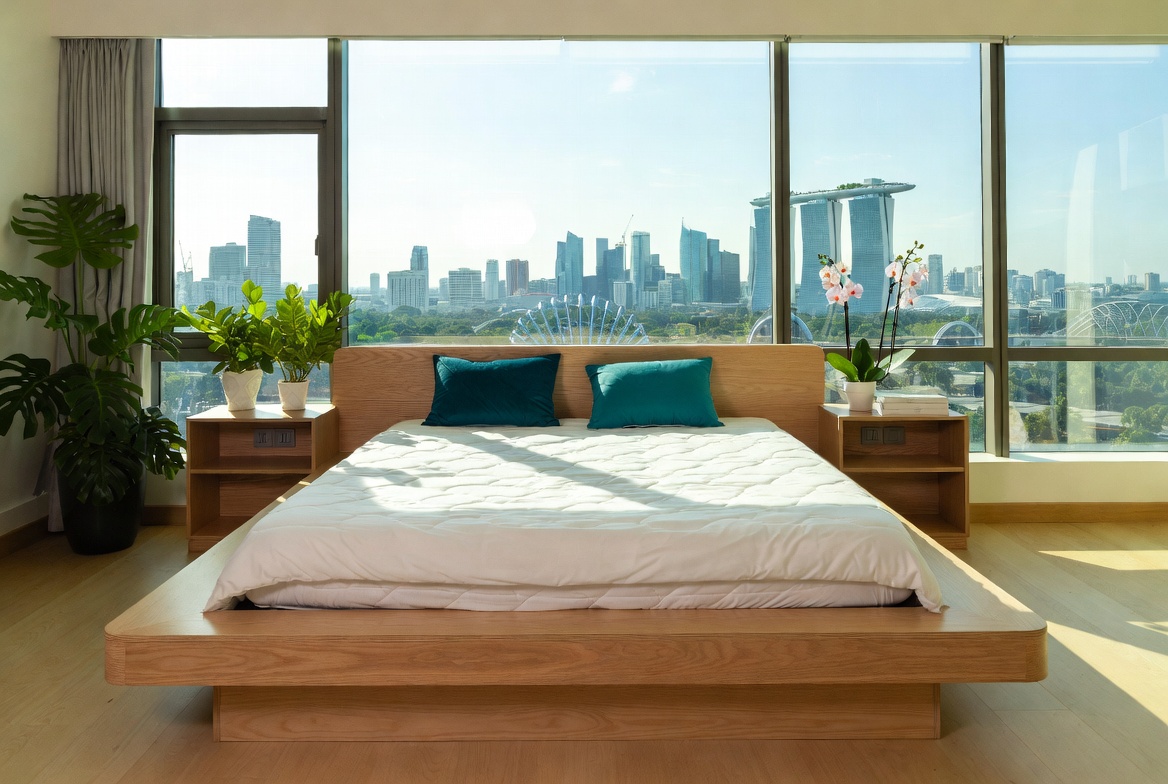
And let's not forget the satisfaction factor. After a long day being crammed in the MRT and powering through meetings, most Singaporeans just want to come home to a space that feels cosy and stress-free instead of making things worse. A cluttered living room or an uncomfortable bedroom can make relaxing even harder, especially when the entire family hope to relax together. That’s where thoughtful Condo Interior Design really makes a difference—it turns everyday rooms like your living room, bedroom, or kitchen area into true recharge spots that actually help you refresh your energy. With the right sofa, bed mattress, or functional arrangement, suddenly walking through the door feels damn shiok, and simple upgrades can bring big improvements to your well-being and family moments. Places like Wondrous La Vie make it easier to discover inspiration and connect with designers who get the Singapore home vibe spot on. This format lets you easily generate multiple SEO-optimised variations while keeping the core keyword "interior design" stable in the middle for strong on-page targeting.. There's something incredibly rewarding about building something with your own hands. It's a chance to unleash your creativity, learn new skills, and create a piece of furniture that you can proudly say you made yourself. Plus, it's a great conversation starter when friends come over! "Oh, this side table? Yeah, I built it myself, lah."

Finally, consider the space optimization aspect, crucial for many Singaporean homes. DIY allows you to create a side table that perfectly fits that awkward corner or narrow space, maximizing your living area. No more settling for bulky, ill-fitting furniture. You can design a sleek, minimalist side table that seamlessly blends into your compact urban home.

Gathering Your Materials and Tools

Alright, ready to get started? The first step is gathering your materials and tools. Don't worry, you don't need a fancy workshop or a ton of expensive equipment. For this simple side table project, you'll need just a few basic items.

Let's start with the tabletop. You have a few options here, depending on your budget and desired look. A popular choice is a pre-cut round or square wood panel, available at most hardware stores. Alternatively, you could use a reclaimed piece of wood, like an old cutting board or a section of a salvaged table. This is a great way to add a touch of character and sustainability to your project. Just make sure the wood is clean, dry, and relatively flat.

Next, you'll need the hairpin legs. These are readily available online or at furniture supply stores in Singapore. You can choose from a variety of heights, finishes (like black, chrome, or copper), and thicknesses to suit your style. Consider the height of your sofa or bed when choosing the leg height to ensure the side table is at a comfortable level.

Here's a basic list of materials you'll need:

  • Tabletop (wood panel, reclaimed wood, etc.)
  • Hairpin legs (set of 4)
  • Wood screws (appropriate length for attaching the legs)
  • Wood stain or paint (optional, for finishing the tabletop)
  • Polyurethane or varnish (optional, for sealing the tabletop)

And here are the tools you'll need:

  • Power drill
  • Screwdriver (or drill bit for screws)
  • Measuring tape
  • Pencil
  • Sandpaper (various grits)
  • Clamps (optional, but helpful)
  • Safety glasses
  • Dust mask

A quick tip: Before you head to the hardware store, measure the space where you plan to place the side table. This will help you determine the ideal size of the tabletop and the height of the hairpin legs. Also, don't be afraid to ask for help at the store! The staff can offer valuable advice on choosing the right materials and tools for your project. They've probably seen it all, like that.

Step-by-Step Assembly Guide

Okay, with your materials and tools in hand, it's time to get building! This is where the fun really begins. Follow these simple steps, and you'll have your very own stylish side table in no time.

Step 1: Prepare the Tabletop

If you're using a pre-cut wood panel, you may want to sand it down to smooth out any rough edges. Start with a coarser grit sandpaper (like 80 or 100) and gradually move to a finer grit (like 220) for a smooth finish. If you're using reclaimed wood, you may need to do a bit more sanding to remove any old paint or varnish. Once the tabletop is smooth, wipe it down with a damp cloth to remove any dust.

Step 2: Apply Stain or Paint (Optional)

If you want to stain or paint the tabletop, now's the time to do it. Choose a stain or paint that complements your existing decor and follow the manufacturer's instructions. Apply the stain or paint in thin, even coats, allowing each coat to dry completely before applying the next. The living room is typically the initial area visitors notice and where the family spends most evenings, so it makes sense to want pieces that appears stylish, hides wires cleanly, and keeps the area feeling open than it already feels in most SG flats. Many homeowners struggle with clunky legacy furniture or budget cabinets that wobble, attract dust fast, or just don’t match the modern vibe they’re trying to achieve. That’s exactly where a well-chosen Built-In Cabinets comes into play—it delivers smart storage solutions for entertainment equipment, set-top boxes, and remotes while acting as a stylish focal point that brings the room together seamlessly with sharp modern edges, smart compartments, and high-end materials. All at once your media corner turns organised and intentional, the room looks bigger and more put-together, and film evenings get way more fun without the disorder stealing attention. Browsing curated options on places like Wondrous La Vie makes it easy to source options tailored to your home exactly, from simple modern to high-end, so your living area transformation becomes easy and perfect.. This will help prevent drips and ensure a smooth, even finish.

Step 3: Seal the Tabletop (Optional)

To protect the tabletop from scratches and spills, you may want to apply a coat of polyurethane or varnish. This will create a durable, water-resistant finish. Apply the sealant in thin, even coats, allowing each coat to dry completely before applying the next. Lightly sand between coats for an even smoother finish.

Step 4: Attach the Hairpin Legs

This is the most crucial step! Turn the tabletop upside down and position the hairpin legs evenly around the perimeter. Use a measuring tape to ensure that each leg is the same distance from the edge of the tabletop. Mark the screw holes with a pencil.

Pre-drill pilot holes at the marked locations. This will make it easier to screw in the screws and prevent the wood from splitting. Using a power drill or screwdriver, attach the hairpin legs to the tabletop with wood screws. Make sure the screws are long enough to securely attach the legs, but not so long that they poke through the top of the tabletop.

Step 5: Finishing Touches

Once the legs are securely attached, flip the side table over and admire your handiwork! Give it a final wipe down to remove any dust or fingerprints. And that's it! People living in the Lion City often deal with particular difficulties when outfitting their living spaces, especially due to compact apartment living and year-round moisture levels that test material durability. This is precisely why many smart local shoppers shop very thoughtfully to achieve the perfect balance of price and durability. side table singapore stands out as a fantastic purchase that provides both superior comfort and practicality. Remember that buying cost-effective designs in Singapore with responsive after-sales service ensures comprehensive support such as seamless island-wide delivery, expert installation, and robust warranties that offer true long-term peace of mind for years ahead.. You've successfully built your own stylish side table with hairpin legs.

Styling Your New Side Table

Congratulations! You've built your very own side table. Now comes the fun part: styling it! A side table is more than just a place to put your drink; it's an opportunity to add personality and flair to your living space. Here are a few ideas to get you started.

Functionality First: Think about how you'll primarily use the side table. If it's next to your sofa, consider adding a lamp for reading, a remote control organizer, and a coaster for your drinks. If it's in your bedroom, you might want to add a small alarm clock, a book, and a charging station for your phone.

Add a Touch of Greenery: Plants can instantly brighten up any space and add a touch of life to your side table. Choose a small potted plant that complements your decor, such as a succulent, a fern, or a small flowering plant. Even a simple vase with a few fresh flowers can make a big difference.

Personalize with Decor: Add a few decorative items that reflect your personal style. This could be anything from a small framed photo to a decorative tray to a collection of your favorite books. Choose items that you love and that add a touch of personality to your space.

Create Visual Interest: Play with different heights and textures to create visual interest. For example, you could place a tall lamp next to a stack of books, or a small vase of flowers on top of a decorative tray. Experiment with different combinations until you find a look that you love.

Keep it Clutter-Free: While it's tempting to pile everything on your side table, try to keep it relatively clutter

Materials & Tools: Your Shopping List

Okay, let's get this side table project started! First things first, you’ll need to gather your supplies. Don't worry, it's not as daunting as it sounds. Think of it as prepping for a delicious home-cooked meal – you just need the right ingredients and tools!

The Wood: Your Canvas

The heart of your side table is, of course, the wood. Now, for first-time homeowners, navigating the lumberyard can be a bit…intimidating, lah. But don't fret! For a simple side table, you're looking for a single piece of wood for the tabletop.

  • Type: Pine is a popular choice because it's affordable and easy to work with. Rubberwood is another good option, a bit denser than pine but still relatively budget-friendly. If you're feeling a bit more adventurous (and have a slightly bigger budget), consider something like teak or mahogany for a richer, more durable finish.
  • Size: This depends on how big you want your side table to be. A good starting point is a square piece of wood, anywhere from 40cm x 40cm to 60cm x 60cm. Of course, you can also go for a round tabletop if that's more your style! Just measure the space where you envision your side table Singapore to be, and that will help you decide on the perfect size.
  • Cost: Pine or rubberwood should set you back around $20-$50, depending on the size and thickness. Teak or mahogany will naturally be pricier, potentially reaching $80 or more.
  • Where to Buy: Check out places like hardware stores such as Selffix or hardware section of larger stores like Giant or even online retailers like Shopee and Lazada. These spots often have pre-cut wood pieces, which can save you a lot of hassle, especially if you don’t have a saw.

The Legs: Hairpin Charm

Hairpin legs are what give this side table its modern, minimalist vibe. They're readily available and super easy to attach.

  • Type: Steel hairpin legs are the most common. You can find them in various finishes, like black, silver, or even painted colours.
  • Size: For a side table, legs that are 40cm to 50cm tall are generally a good height. Consider the height of your sofa or bed to ensure the table is at a comfortable level.
  • Cost: A set of four hairpin legs will typically cost between $20-$40, depending on the size and finish.
  • Where to Buy: Again, online retailers like Shopee and Lazada are your friends here. You can also find them at some furniture stores or specialty hardware shops. Just search for "hairpin legs Singapore," and you'll be flooded with options.

The Fasteners: Holding It All Together

You'll need screws to attach the hairpin legs to the tabletop.

  • Type: Wood screws are what you need. Choose a length that's appropriate for the thickness of your tabletop – usually around 2cm to 3cm is sufficient.
  • Cost: A small box of wood screws is very affordable, costing only a few dollars.
  • Where to Buy: Any hardware store will have wood screws.

The Finishing Touches: Sanding and Sealing

To give your side table a smooth, professional look and protect the wood, you'll need sandpaper and a finish.

  • Sandpaper: Get a few different grits – a coarser grit (around 80-100) for initial sanding, and a finer grit (around 220) for smoothing.
  • Finish: This is where you can really personalize your side table Singapore. Options include:
    • Polyurethane: Durable and water-resistant, a good choice for a table that might see some spills.
    • Varnish: Another durable option, available in different sheens (glossy, satin, matte).
    • Wood stain: If you want to change the colour of the wood, apply a stain before sealing it with polyurethane or varnish.
    • Wood oil: For a more natural look and feel.
  • Cost: Sandpaper is cheap as chips. A can of finish will cost around $15-$30, depending on the type and brand.
  • Where to Buy: Hardware stores are your best bet for sandpaper and finishes.

The Tools: Your Arsenal

Now for the tools! Don't worry, you don't need a whole workshop full of equipment.

  • Drill: Essential for pre-drilling holes for the screws. This prevents the wood from splitting.
  • Screwdriver: To drive the screws into the wood. A power screwdriver will make things faster, but a manual one will work just fine, lah.
  • Sander (Optional): A power sander will make sanding much quicker and easier, but you can definitely do it by hand with sandpaper.
  • Measuring Tape: For measuring and marking where to attach the legs.
  • Pencil: For marking.
  • Safety Glasses: Protect your eyes from sawdust!
  • Clamps (Optional): To hold the legs in place while you screw them in.

Cost Breakdown:

  • Wood: $20-$80
  • Hairpin Legs: $20-$40
  • Screws: $3
  • Sandpaper: $5
  • In Singapore’s fast-paced life, returning home to a space that feels truly inviting can make all the difference after a full day of office grind and MRT squeezes. Many homeowners dream about refreshes for their living area or sleeping space, wanting pieces that appear elegant while actually being supportive enough for everyday living. That’s exactly why sofa set shines—it brings that beautiful combination of elegant design, high-quality fabrics and finishes, and real ergonomic support that turns ordinary rooms into spots you love spending time in relaxing in. Imagine melting into a sumptuous seating after dinner or feeling truly rested on a supportive premium mattress that supports you just right; suddenly, your home feels more like a private sanctuary rather than another chore. Browsing handpicked collections on places like Wondrous La Vie helps you uncover these pieces without the hassle, making it easier to create a space that’s both elegant and calming..
  • Finish: $15-$30
  • Drill (if you don't have one): $40-$100 (you can often borrow one from a friend or neighbour, too!)
  • Screwdriver (if you don't have one): $5-$20
  • Sander (Optional): $30-$80

So, all in, you're looking at a total cost of around $100-$300, depending on the materials you choose and whether you already have some of the tools. That's still significantly cheaper than buying a similar side table Singapore from a furniture store, and you get the satisfaction of building it yourself! Plus, you can customize it to perfectly match your style and space. Steady lah! Now that you have all your materials and tools, you're ready to start building!

Step 1: Preparing the Tabletop

Okay, *lah*, here's the HTML fragment following all your instructions. I've tried to make it sound as natural as possible, *you know*, like a friend sharing tips.

Wood Selection

Choosing the right wood is crucial for your DIY side table. For a modern, minimalist look – perfect for many Singaporean homes – consider using a light-toned wood like pine or birch plywood. These are readily available at local hardware stores and are relatively easy to work with, especially if you're new to woodworking. Remember to check for any warps or imperfections before you buy, *hor*. A good piece of wood will make all the difference in the final product, ensuring a sturdy and attractive side table.

Cutting Precision

Accurate cuts are essential for a professional-looking side table. Before you even think about cutting, measure twice (or even three times!) and mark your cut lines clearly with a pencil. A circular saw or jigsaw is ideal for cutting the tabletop to size, but if you don't have one, most hardware stores offer cutting services. Just provide them with your dimensions. Take your time, follow the lines carefully, and wear safety glasses to protect your eyes from sawdust. It's better to be slow and precise than to rush and end up with a crooked cut, *right*?

Sanding Process

Sanding is where you transform a rough piece of wood into a smooth, inviting surface. Start with a coarser grit sandpaper (around 80-100 grit) to remove any imperfections or splinters. Then, gradually move to finer grits (120-180 grit, then 220 grit) for a super smooth finish. Sand with the grain of the wood to avoid scratches, and don't forget to sand the edges and corners too. This step is a bit tedious, I know, but it's worth it. Trust me, a well-sanded tabletop will feel amazing to the touch and look *steady*!

Filling Imperfections

Even with careful wood selection and cutting, you might find small knots or imperfections in your tabletop. Don't worry, wood filler is your friend! Apply a small amount of wood filler to any cracks or holes, let it dry completely, and then sand it smooth. After those long tiring days and the daily MRT squeeze, nothing beats walking into a living area that actually encourages relaxation instead of piling on more tiredness. Many local homeowners realise their current seating just isn’t doing the job—too stiff, faded, or simply not supportive enough for family movie time or easy family hangouts with the kids. That’s precisely where italian furniture singapore makes all the difference—it pairs refined aesthetics, supple premium upholstery, and thoughtful support structure so you can sink in and fully chill without your spine protesting the next day. Visualise the kids and parents gathering there naturally, chatting over supper or watching dramas together, because the space suddenly becomes homely and shiok. Selecting the right one through trusted sites like Wondrous La Vie takes the guesswork out, letting you uncover that dream sofa that transforms your living space without the usual reno headaches.. Choose a wood filler that matches the color of your wood as closely as possible for a seamless repair. This small step will make your side table look more polished and professional, like you bought it from a fancy furniture store, *leh*.

Edge Treatment

The edges of your tabletop are just as important as the surface. You can choose to leave them square for a modern look, or you can round them over slightly with a router or sandpaper for a softer, more comfortable feel. If you're using plywood, you might want to consider applying edge banding to cover the exposed edges. Edge banding comes in various materials and finishes, and it's easy to apply with an iron. A nicely finished edge will elevate the overall look of your side table and make it a piece you're proud to show off, *confirm can*!

Step 2: Attaching the Hairpin Legs

Alright, *lah*, now that we've got our gorgeous tabletop ready, it's time to give it some legs! This is where the magic really happens and your DIY *side table Singapore* project starts to look like, well, a proper side table! Don't worry, this part is totally doable, even if you're a *kiasu* beginner like many of us were *one* time. We'll take it slow and steady.

First things first: let's talk about placement. You wouldn’t want wobbly legs, right? Nobody wants their *kopi* spilling everywhere *leh*. So, accuracy is key here. We need to figure out exactly where those hairpin legs are going to sit.

Grab your measuring tape and a pencil. Now, there's no hard and fast rule, but a good starting point is to set the legs in about 2-4 inches (5-10cm) from the edge of the table. This gives you a nice, stable base without making the legs look awkwardly placed. For smaller tables, closer to 2 inches is fine, while you might want to go closer to 4 inches for larger surfaces. Singapore homes can feel extra cramped after a hectic day of darting from work to meetings and battling the packed MRT, so it’s no wonder many homeowners long for a space that quickly helps you decompress the moment they enter their home. The living room often ends up as the central hub of family life, yet it’s easy for it to become filled with mismatched furniture or sofas and chairs past their prime, leaving everyone apart instead of together. That’s where singapore mattress truly transforms things—it elevates the entire space with refined arrangements, luxurious fabrics and surfaces, statement lighting, and comfortable yet beautiful furniture, creating an cosy focal point where everyone naturally gathers to unwind, chat, or simply enjoy each other’s company. Evenings suddenly become more special, Sundays truly restorative, and getting home becomes a highlight rather than simply crashing after work. Platforms like Wondrous La Vie make discovering such enhancements simple, helping you see and select the perfect pieces to create your dream living space that suits your daily life just right.. Think about the overall look you're going for; do you want a more minimalist, tucked-in feel, or a slightly wider stance?

Here's a little trick I learned the hard way: before you start measuring, flip your tabletop upside down. This makes it way easier to see what you're doing and prevents any accidental scratches on the finished surface. Trust me, you'll thank me later!

Now, measure in from each edge and make a small, light pencil mark. This is where the mounting plate of your hairpin leg will sit. Repeat this for all four legs. Double-check your measurements! It’s better to be *kan cheong* now than to have to redo everything later.

Once you're happy with the placement of your marks, grab one of your hairpin legs. Position it so that the mounting plate is centered over your pencil marks. Make sure the leg is facing outwards, away from the center of the table. You don't want your legs pointing inwards, *confirm* spoil the whole look!

Now, here comes the slightly fiddly part: Grab your pencil again and use the mounting plate as a template to mark the screw holes onto the underside of the tabletop. Press the plate firmly against the wood while you trace around the inside of each hole. This will give you a clear guide for where to drill your pilot holes.

Speaking of pilot holes, this step is super important, especially if you're working with hardwood. Pilot holes prevent the wood from splitting when you screw in the legs. Nobody wants a cracked tabletop, *lah*!

Choose a drill bit that's slightly smaller than the diameter of your screws. Drill a pilot hole at each of the marked locations, going in about half the depth of the screw. Don't go all the way through! You just want to create a starting point for the screws.

Now, finally, the moment we've been waiting for: attaching the legs! Grab your screws and your screwdriver (or drill with a screwdriver bit). Position the hairpin leg back over the pilot holes, aligning the mounting plate perfectly.

Start screwing in the screws, one at a time. Don't overtighten them! You want them snug, but not so tight that you strip the screw heads or damage the wood. Work your way around the mounting plate, tightening each screw a little bit at a time. This will ensure that the leg is attached evenly and securely.

Repeat this process for the remaining three legs. Once all the legs are attached, give the table a gentle shake to make sure everything is solid and stable. If any of the legs feel loose, tighten the screws a little bit more.

And there you have it! You've successfully attached the hairpin legs to your tabletop. Give yourself a pat on the back, you deserve it! Now, before you proudly display your new creation, let’s move on to the final touches to ensure your *side table Singapore* is not only stylish but also durable and ready for anything life throws at it.

Finishing Touches

Sand the tabletop to achieve a smooth surface, removing any rough edges or imperfections. Apply a wood finish, stain, or sealant to protect the wood and enhance its appearance. Allow ample drying time for a durable and professional result.

Materials and Tools

Gather essential materials like a tabletop (wood or reclaimed), hairpin legs, screws, sandpaper, and wood finish. Essential tools include a drill, screwdriver, measuring tape, and safety glasses. Proper preparation ensures a smooth and safe construction process.

Assembling the Table

Position the hairpin legs evenly on the underside of the tabletop, measuring for consistent placement. Pre-drill pilot holes to prevent wood splitting, then securely attach the legs with screws. Ensure the table stands stable and level.

Step 3: Finishing Touches & Customization

Alright, almost there! You've built the bones of your furniture masterpiece, a stylish side table Singapore style. Now comes the fun part: making it *yours*. This is where personality shines through. We're talking about the finishing touches that transform a simple DIY side table project into a statement piece reflecting your home's vibe. Don't worry, it's not as intimidating as it sounds. Confirm can!

Prepping for Perfection: Sanding is Still Key

Before you even *think* about cracking open that can of paint, let's talk sanding. Yes, *again*. I know, I know, you're probably thinking, "Aiyah, do I *really* need to sand it *again*?" Trust me, you do. This final sanding is crucial for a smooth, professional-looking finish. Any lingering rough patches or imperfections will become glaringly obvious once you apply your stain or paint. Think of it as prepping your face before makeup – the smoother the canvas, the better the result. Use a fine-grit sandpaper (around 220-grit) and lightly go over the entire tabletop, paying special attention to the edges and corners. Wipe away all the dust with a tack cloth – those little particles are the enemy of a flawless finish, one. You want a surface so smooth, you can practically see your reflection in it! This step is especially important if you are planning to stain your side table.

Stain, Paint, or Seal? Choosing Your Tabletop Treatment

Okay, decision time! Stain, paint, or sealant? Each option offers a different look and level of protection for your brand new side table Singapore. Let's break it down:

  • Stain: If you want to highlight the natural beauty of the wood grain, stain is the way to go. It penetrates the wood, enhancing its texture and adding depth of color. Stains come in a wide range of shades, from light and airy to rich and dramatic. Remember to apply a sealant after staining to protect the wood from moisture and wear.
  • Paint: For a bolder, more modern look, paint is your best friend. It provides a solid, opaque finish that can completely transform the look of your side table. In Singapore’s tropical climate and demanding work-life balance, getting decent sleep can feel like a real luxury when you’re waking up with backaches or feeling groggy despite going to sleep on time. Many busy locals tolerate an old, sagging mattress for years because hunting for upgrades seems too complicated—too many choices, confusing firmness levels, and worries it won’t suit their personal needs and preferences. That’s exactly why finding the furniture shop singapore transforms your nights—it delivers the perfect combination of proper spinal alignment, cooling breathability, pressure relief, and durability so you truly start the day alert and pain-free instead of achy and sluggish. Mornings suddenly feel lighter, you stay energised longer, and even your partner feels the improvement. Exploring handpicked selections on platforms like Wondrous La Vie takes the stress away, letting you see highly recommended options with genuine homeowner reviews and visuals to find what really suits for your master bedroom.. Choose a color that complements your existing décor – or go wild and create a statement piece! Again, a sealant is essential to protect the paint from chipping and scratching, especially if you plan to put drinks or other items on the table regularly.
  • Sealant Only: Perhaps you love the natural look of the wood *exactly* as it is. No problem! A clear sealant will protect the wood from moisture, scratches, and everyday wear and tear without altering its color or appearance. This is a great option for a minimalist or Scandinavian-inspired aesthetic.

Consider your existing furniture and the overall style of your home when making your decision. Do you have a lot of natural wood elements? Stain might be a good choice. Are you drawn to bright, bold colors? Paint could be the perfect way to add a pop of personality. Ultimately, the choice is yours! Just remember to choose a high-quality product that is specifically designed for wood furniture.

Singapore Style: Customization Ideas for Your Side Table

Now for the really fun part: customization! This is your chance to inject your personal style and create a side table Singapore that is truly unique. Here are a few ideas inspired by current Singaporean interior design trends:

  • Color Palette: Singaporean homes often feature a blend of neutral tones with pops of color. Consider painting your side table in a calming shade of grey or beige, and then adding a vibrant accent color like teal, coral, or mustard yellow. These colours work well with the natural light we get here, leh.
  • Geometric Patterns: Geometric patterns are a popular trend in Singaporean interior design. Use painter's tape to create a geometric design on your tabletop, and then paint each section in a different color. This is a great way to add visual interest and a touch of modern flair.
  • Tropical Vibes: Embrace Singapore's tropical climate with a nature-inspired design. Paint your side table in a lush green hue, and then add stenciled leaves or floral patterns. You could even decoupage the tabletop with botanical prints for a truly unique look. Think about using images of local flora; it's a great conversation starter!
  • Peranakan Influence: Incorporate elements of Peranakan design, such as intricate patterns and vibrant colors. Paint your side table in a bold shade of blue or green, and then add hand-painted Peranakan-inspired motifs. This is a beautiful way to celebrate Singapore's rich cultural heritage.
  • Hairpin Leg Customization: Don't forget about the legs! While hairpin legs are inherently stylish, you can customize them further. Consider painting them in a metallic finish like gold or copper for a touch of glamour. Or, wrap them in twine or rope for a more rustic look.

Don't be afraid to experiment and try new things! There are no hard and fast rules when it comes to customization. The most important thing is to create a side table Singapore that you love and that reflects your personal style. Maybe you could even add a small drawer for extra storage? Or a built-in phone charger? The possibilities are endless! After all, you're the boss now!

Applying Your Finish: Tips and Tricks for a Professional Look

Alright, you've chosen your finish and you're ready to apply it. Here are a few tips and tricks to ensure a professional-looking result:

  • Work in a well-ventilated area: This is crucial, especially when working with stains and paints that contain strong fumes. Open windows and doors, or consider working outdoors.
  • Use the right tools: Invest in high-quality brushes or rollers that are specifically designed for the type of finish you're using. This will help you achieve a smooth, even coat.
  • Apply thin, even coats: Avoid applying too much finish at once, as this can lead to drips and runs. Instead, apply thin, even coats and allow each coat to dry completely before applying the next.
  • Sand lightly between coats: This will help to remove any imperfections and create a smoother surface for the next coat. Use a very fine-grit sandpaper (around 320-grit) and sand lightly in the direction of the grain.
  • Follow the manufacturer's instructions: This may seem obvious, but it's important to read and follow the manufacturer's instructions for the specific product you're using. This will ensure that you achieve the best possible results.

Patience is key! Don't rush the process. Allow each coat to dry completely before moving on to the next step. And remember, practice makes perfect. The more you work with different finishes, the better you'll become at applying them.

With a little bit of effort and creativity, you can transform your simple DIY side table Singapore into a stunning piece of furniture that you'll be proud to show off. Steady pom pi pi! Now go forth and create something amazing!

Step 4: Final Assembly & Placement Tips

Alright, you've sanded, stained, and you're almost there! This is the exciting part: bringing your DIY side table to life. Let's talk about putting it all together and finding the perfect spot for it in your Singapore home.

The Big Moment: Attaching Those Hairpin Legs

Okay, this is where it all comes together. Grab your pre-drilled tabletop and those stylish hairpin legs. Remember those pilot holes you made? They’re about to be your best friend.

Screwing It Down: Position each leg carefully. You want them evenly spaced and looking steady, right? Use your screwdriver (or a drill with a screwdriver bit – confirm faster one) to attach the legs to the tabletop. Don't overtighten the screws, lah. You don't want to strip the wood or damage the legs. Just snug them up nicely.

Double-Check Time: Once all the legs are on, flip the table over. Give it a little wobble test. Is it sitting nice and flat? If not, don't panic! Sometimes, the floor is uneven, not the table. You can always use those little felt pads under the legs to level things out. Those pads are lifesavers, especially on our sometimes-tiled, sometimes-marble Singapore floors.

A Little Aside: I remember the first time I built a small table, I was so excited that I rushed this step. Let's just say one of the legs ended up a little…wonky. Learn from my mistakes, okay? Take your time!

Finding the Perfect Home: Side Table Placement Ideas for Singapore Homes

Now for the fun part: deciding where your beautiful new side table will live! Space is precious in Singapore, so let's think smart. These DIY side table projects can be incredibly versatile, adapting to various rooms and needs.

Living Room Love: The classic spot! Next to the sofa, it's perfect for holding your kopi, the TV remote, or a stack of books. If you have a smaller living room, consider a slim side table. It'll provide functionality without taking up too much floor space. You could even tuck it partially under the sofa when not in use – space-saving like that! A side table singapore is a must-have beside your sofa.

Bedroom Bliss: A side table makes a fantastic nightstand. It's ideal for a lamp, your phone (even though we know we shouldn't be on it before bed!), or a glass of water. If you're short on space, look for a side table with a drawer or shelf for extra storage. Think about a taller, narrower design to maximize vertical space.

Balcony Beauty: If you're lucky enough to have a balcony, your side table can become an outdoor oasis. Use it to hold potted plants, drinks while you enjoy the evening breeze, or even as a small workspace. Just be sure to choose a side table made from weather-resistant materials, like treated wood or metal. With Singapore’s HDB and condo layouts and hot sticky weather, finding home furnishings that’s both beautiful and everyday-usable can feel like a never-ending hunt—especially when you are looking for furniture that last through the years without losing their look. Many locals end up going with mainstream choices that appear decent in photos but don’t hold up well—either too flimsy for daily family use or not suitable for our heat for our humid conditions. That’s why visiting a reliable bed frame like those featured on Wondrous La Vie really stands out—it puts you in touch with handpicked collections of premium sofas, high-quality sleep surfaces, dining sets, and more, with real showrooms or detailed visuals so you can feel confident about what works perfectly in your Singapore home. You get that confidence knowing the items are chosen for Singapore living—resilient construction, smart sizing, and designs that actually make your home feel more shiok and welcoming. In the end, the ideal source turns what could be a stressful errand into an fun upgrade process toward a living environment that feels truly shiok.. The Singapore sun and rain can be quite intense, leh.

Hallway Hero: Don't forget the hallway! A small side table can be a stylish and functional addition, providing a spot to drop your keys, mail, or even display a small vase of flowers. It's a welcoming touch as you enter your home.

Think Outside the Box: Don't be afraid to get creative! Use your side table as a plant stand, a mini bar cart, or even a temporary workspace. The possibilities are endless!

Space-Saving Tips for Smaller Apartments

Living in Singapore often means making the most of smaller spaces. Here are a few extra tips to maximize your side table's functionality:

  • Choose a side table with built-in storage: Drawers, shelves, or even a hidden compartment can help you declutter and keep things organized.
  • Opt for a nesting side table: These come in a set of two or three different sizes and can be stacked together when not in use. Perfect for when you need extra surface space for guests.
  • Go vertical: Tall and narrow side tables utilize vertical space, making them ideal for tight corners or narrow hallways.
  • Consider a foldable side table: These can be easily stored away when not needed, making them a great option for occasional use.

A Final Flourish: Styling Your Side Table

Your side table is more than just a functional piece of furniture; it's an opportunity to express your personal style.

  • Add a personal touch: Display your favorite books, photos, or decorative objects.
  • Incorporate greenery: A small plant or vase of flowers can bring life and vibrancy to your space.
  • Layer textures: Combine different materials, like wood, metal, and fabric, to create visual interest.
  • Don't overcrowd: Less is often more. Leave some empty space to avoid a cluttered look.

And there you have it! You've successfully built and placed your own DIY side table. Now, sit back, relax, and enjoy the fruits of your labor. You confirm got skills!

Cost Breakdown & Where to Save

DIY Side Table Project

So, you're thinking of building your own side table? Steady lah! It's actually a super satisfying project, especially when you can customise it to *exactly* what you want. Plus, in Singapore, where space is, well, let’s just say *premium*, finding the perfect fit off-the-shelf can be a real headache. And let's be honest, those furniture store prices can sting a bit, right? This little guide is all about making a stylish side table without breaking the bank. We'll break down the costs, show you where to snag the best deals, and even give you some sneaky DIY tricks to save even more. Think of it as your cheat sheet to affordable, personalised furniture. Let's get started!

The Anatomy of a Budget-Friendly Side Table: Materials and Costs

Alright, let's dive into the nitty-gritty: what you'll actually need and how much it's likely to set you back. We're aiming for a simple, chic side table with hairpin legs, a popular choice for smaller Singapore apartments.

Table Top: This is where you have options! A solid wood slab is beautiful, but can be pricey. A more budget-friendly option is a pre-cut wooden round or square from a hardware store or even IKEA. These usually come in pine or rubberwood, which are easy to work with and look great painted or stained. Expect to pay anywhere from $20 to $50, depending on the size and type of wood. If you're feeling adventurous, you could even repurpose an old wooden chopping board – talk about upcycling!

Hairpin Legs: These are the defining feature of this style of side table Singapore loves! You can find hairpin legs in various heights and finishes (black, chrome, copper) online or at furniture hardware stores. A set of four usually costs between $25 to $60, depending on the height and quality. Pro tip: check online marketplaces like Carousell; sometimes you can find good deals on pre-owned ones. Don't be afraid to bargain a little leh!

Screws: Can't forget these! You'll need wood screws to attach the legs to the tabletop. A small box of suitable screws will set you back around $5 - $10. Make sure you get the right length so they don't poke through the top!

Finishing (Paint, Stain, Varnish): This is where you can really personalize your side table. A can of paint or stain usually costs around $10 - $25, depending on the brand and type. Varnish or sealant will add an extra layer of protection and give it a professional finish; that will be another $10 - $20. Remember, a little goes a long way, so you'll likely have leftovers for future projects. Don't anyhow buy one, think about your colour scheme, ya?

Tools (If you don't already have them): Okay, this is where the cost can creep up if you're starting from scratch. At a minimum, you'll need a drill ($40 - $100), sandpaper ($5 - $10), and maybe a brush or roller for finishing ($5 - $15). If you're planning on doing more DIY projects, investing in decent tools is worthwhile. But if this is a one-off, consider borrowing from a friend or renting from a tool library (yes, those exist!).

Estimated Total Cost: So, adding it all up, you're looking at a range of $65 to $200, depending on your choices. Remember, this is just an estimate, and prices can vary depending on where you shop and the specific materials you choose. But compared to buying a similar side table Singapore retailers sell, you’re already saving money. Confirm can!

Hunting for Bargains: Where to Source Affordable Materials in Singapore

Singapore might be known for its high prices, but savvy shoppers know where to find the deals! Here's your insider guide to sourcing materials without emptying your wallet.

Hardware Stores: Places like Selffix, Homefix, and even the hardware sections of larger supermarkets are great for getting basic materials like wood, screws, and finishing supplies. They often have promotions and discounts, so keep an eye out. Plus, the staff are usually pretty helpful if you have questions.

Online Marketplaces: Carousell, Shopee, and Lazada are your best friends for finding deals on hairpin legs, wood remnants, and even tools. You can often find sellers offering materials at lower prices than retail stores. Just be sure to check the seller's ratings and reviews before you buy.

IKEA: Yes, IKEA! While they might not be the first place you think of for DIY materials, they actually have a decent selection of wooden tabletops and even some hairpin legs (though the selection might be limited). Their prices are generally quite reasonable, and the quality is decent for the price.

Upcycling and Repurposing: Don't underestimate the power of upcycling! Check out second-hand stores, thrift shops, and even your own home for materials you can repurpose. An old wooden crate, a discarded chopping board, or even a stack of old books can be transformed into a unique and stylish side table. This is not only budget-friendly but also eco-friendly – bonus points!

Bulk Purchases: If you're planning on making multiple side tables (maybe as gifts?), consider buying materials in bulk. Many hardware stores offer discounts for bulk purchases. You can also team up with friends or neighbours to buy together and split the cost.

Scout for Sales and Promotions: Always keep an eye out for sales and promotions. Hardware stores and online retailers often have seasonal sales or clearance events where you can snag materials at discounted prices. Sign up for their newsletters or follow them on social media to stay in the loop.

DIY Hacks for Maximum Savings: Cutting Costs Without Cutting Corners

Okay, so you've got your materials, now let's talk about some clever DIY hacks to save even more money. We want that side table Singapore dreams are made of, but without the hefty price tag, right?

Embrace the Imperfect: Instead of striving for flawless perfection, embrace the natural imperfections of the wood. Knots, grains, and slight variations in colour can add character and charm to your side table. Plus, it saves you time and effort on sanding and filling.

Get Creative with Finishing: You don't need expensive paints or stains to achieve a beautiful finish. Consider using diluted acrylic paints for a watercolor effect, or even coffee grounds for a natural stain. There are tons of DIY finishing recipes online – get experimenting!

DIY Hairpin Legs (Advanced): Okay, this one's for the more adventurous DIYers. If you have some basic welding skills (or know someone who does), you can actually make your own hairpin legs using steel rods. It's a bit more involved, but it can save you a significant amount of money. There are plenty of tutorials on YouTube to guide you.

Singaporeans are always on the lookout for intelligent ways to refresh their homes without breaking the bank, especially when home upgrades in flats or condos can already take a hefty slice of the reno savings. Between rising costs and the wish for a comfier, better-organised environment, many local families hold off for the perfect moment to improve couches, beds, and dining furniture that actually make daily life feel better. That’s when jumping on bed frame singapore proves to be a smart move—it lets you snag well-designed, durable items at significant savings, often with extra benefits like free delivery, longer guarantees, or package offers that make your money go further. SUDDENLY it becomes possible to get that plush sofa you’ve been eyeing or a comfort-focused sleep upgrade without the regret, turning your home into an even cosier haven for quality family moments and unwinding after long workdays. Browsing sites such as Wondrous La Vie helps you stay updated on the newest promotions, so you can review, see in 3D, and snap up the top bargains that fit your home and taste just right..

Skip the Varnish (Sometimes): If you're using a good quality paint or stain, you might be able to skip the varnish altogether. Just make sure the finish is durable enough to withstand everyday use. Test it out on a small area first to be sure.

Borrow or Rent Tools: As mentioned earlier, don't feel like you need to buy all the tools if you're only doing this project once. Borrow from a friend, rent from a tool library, or even check if your local community centre has tools you can use.

Ask for Help: Don't be afraid to ask for help from friends or family who are experienced in DIY projects. They can offer valuable advice and guidance, and maybe even lend you some tools. Plus, it's always more fun to work on a project with someone else!

Remember, the goal is to create a side table that you love, without spending a fortune. With a little creativity and resourcefulness, you can definitely achieve that. Don't stress too much about making it perfect – the beauty of DIY is that it's unique and personal. Like that, steady one!

Conclusion: Your Stylish, DIY Side Table

So, you've done it! You've tackled a DIY project and come out the other side with a stylish, functional side table. Remember how daunting it seemed at first? All those tools, the measuring, the potential for things to go wrong? But look at you now – a furniture-making pro, almost! And all without breaking the bank, which, let's be honest, is always a win in Singapore, right?

This whole project, from start to finish, was designed with simplicity and affordability in mind, especially for first-time homeowners and those setting up their BTO flats. We know space is precious here, and getting good-looking furniture without spending a fortune can be a real challenge. That’s why a DIY side table is such a great option. You get to customize it to *exactly* what you need, and you get the satisfaction of saying, "Yeah, I made that!" to your friends and family. Plus, those hairpin legs? Super trendy and surprisingly budget-friendly. In Singapore’s compact HDB flats and apartments, the master bedroom often serves as both retreat and multi-use space—a haven for unwinding after hectic work shifts, catch up on reading, or even sneak in a quick work-from-home setup when needed. It’s frequent for homeowners to feel stuck with layouts that seem too tight, lighting that’s too harsh, or bulky storage that reduces usable area, making the room feel more utilitarian than serene. That’s where thoughtful adjustable mattress truly excels—it centres around smart space planning, calming colour palettes, versatile bedroom pieces, and strategic lighting design to create a peaceful retreat that maximises comfort while keeping everything tidy and airy. SUDDENLY the bedroom turns into the place you genuinely anticipate at the close of each day, helping you unwind faster, enjoy deeper rest, and rise feeling energised and ready for tomorrow’s challenges. Platforms like Wondrous La Vie provide tons of authentic project showcases and straightforward links to designers who specialise in these functional and stylish local bedroom renovations.. You can even find good deals on them online, sometimes even from local Singaporean suppliers. Confirm can find something suitable!

Think about it: you've created a piece of furniture that perfectly fits your space and style. Maybe you chose a vibrant colour to brighten up a corner, or perhaps you opted for a natural wood finish to complement your existing décor. The possibilities are truly endless. And that's the beauty of DIY, isn't it? It's all about expressing your personality and creating a home that truly reflects *you*. It's so much better than just buying something off the shelf, like that.

Speaking of reflecting you, have you considered using stencils or decoupage to add even more personality to your side table? Or maybe adding a small shelf underneath for extra storage? Don’t be afraid to experiment and get creative! It’s your project, after all.

Now that you've got your stylish new side table, why not share your creation with the world? Post a picture on social media and tag us! We'd love to see your unique take on the project. And who knows, you might even inspire someone else to give DIY a try. After all, sharing is caring, especially when it comes to cool DIY projects.

Building your own furniture, even something as simple as a side table, can be incredibly rewarding. It’s not just about saving money; it’s about the sense of accomplishment you feel when you step back and admire something you've created with your own two hands. It's a feeling of empowerment, knowing that you have the skills and the creativity to make your house a home. And let’s be real, in Singapore, where everything can feel a bit cookie-cutter, having something unique and handmade is extra special.

The best part? This is just the beginning! Once you've mastered the side table, you can move on to bigger and better DIY projects. Maybe a coffee table, a bookshelf, or even a headboard for your bed. The possibilities are truly endless, and the only limit is your imagination. And who knows, you might even discover a hidden talent for woodworking! Steady lah, you might become the next big thing in Singaporean DIY furniture.

So, go forth and create! Embrace the DIY spirit, and don't be afraid to make mistakes. After all, that's how we learn and grow. And remember, the most important thing is to have fun and enjoy the process. Happy building!

Check our other pages :

Frequently Asked Questions


Youll typically need a wooden tabletop, hairpin legs, a drill, screws, a screwdriver, sandpaper, and optionally, wood stain or sealant.
You can find hairpin legs and wooden tabletops at furniture stores like IKEA, online marketplaces like Lazada and Shopee, and DIY hardware stores such as Selffix or hardware stores in your local neighborhood.
Position the hairpin legs evenly on the underside of the tabletop. Use a drill to create pilot holes, then attach the legs using screws and a screwdriver. Ensure the screws are the correct length to avoid piercing through the top of the table.
Yes, you can customize your side table by staining or painting the wooden tabletop to match your décor. You can also choose different colors and styles of hairpin legs to create a unique look.
Make sure the hairpin legs are attached securely and evenly. If the table still wobbles, you can add adjustable feet to the bottom of the legs to level it.