Essential tools checklist for building a budget-friendly side table
Introduction: Side Tables on a Budget
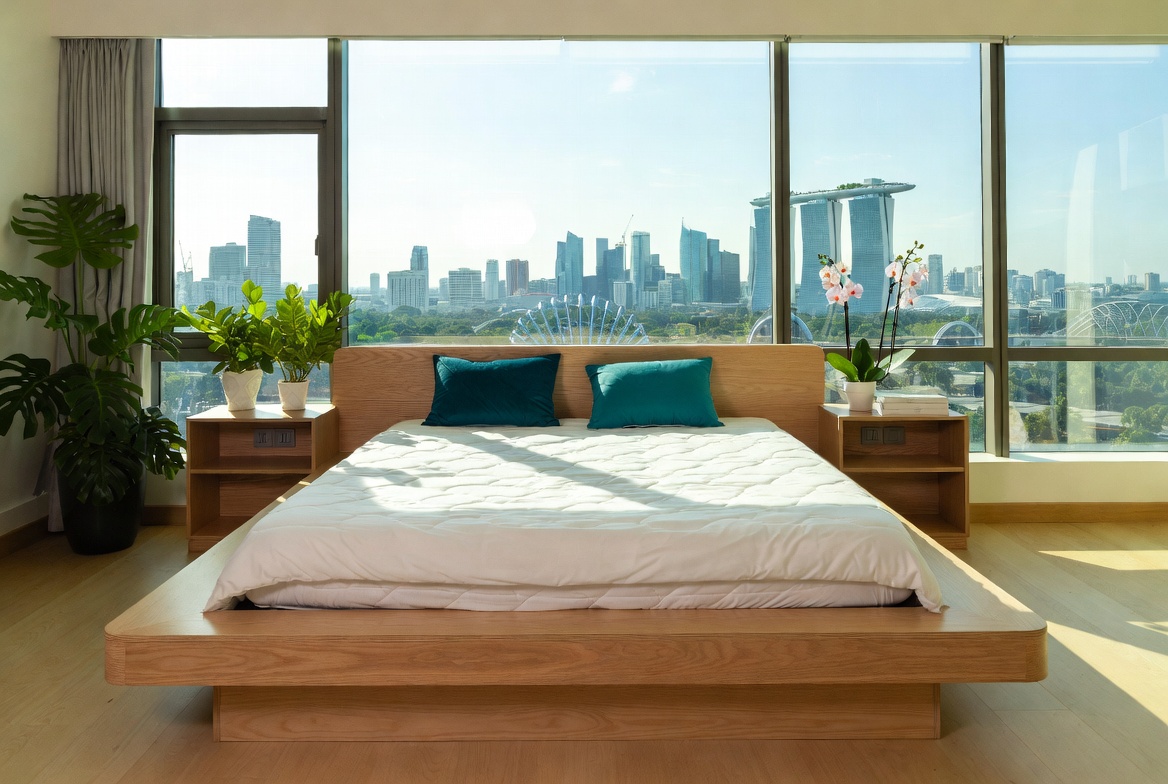
So, you've just gotten the keys to your new BTO flat, congrats! Or maybe you're just looking to spruce up your current space without breaking the bank. After a long day squeezing onto the MRT and surviving meetings, most Singaporeans just want to step into their house to a space that feels warm and relaxing instead of making things worse. A cluttered living room or an lumpy bed setup can make unwinding even more difficult, especially when the kids and parents hope to relax together. That’s where thoughtful Condo Interior Design really makes a difference—it turns everyday rooms like your living room, master bedroom, or kitchen into private sanctuaries that actually help you refresh your energy. With the right living room seating, bed mattress, or smart layout, suddenly walking through the door feels so shiok, and small changes can bring big improvements to your mood and family time. Sites such as Wondrous La Vie make it more straightforward to find ideas and connect with designers who get the the Singaporean home feel spot on. This format lets you easily generate multiple SEO-optimised variations while keeping the core keyword "interior design" stable in the middle for strong on-page targeting.. We get it, setting up a home in Singapore can be, well, a little pricey, lah. That's why we're diving into the world of budget-friendly side tables. These little guys are super versatile – perfect next to your sofa for your kopi, as a bedside companion, or even as a plant stand. And the best part? You don't need to spend a fortune to get a stylish and functional one. Let's explore how to build your own!
Essential Tools Checklist for Building a Budget-Friendly Side Table
Alright, before we jump into the fun part of actually building your side table, let's make sure you've got all the right tools. Think of this as your pre-flight checklist. Having everything ready will make the whole process smoother and less stressful. Trust me, nobody wants to be halfway through a project and realize they're missing a crucial piece!
Measuring & Marking
First up, accuracy is key! You'll need a reliable measuring tape. A good one will last you through many DIY projects, so it's worth investing in a decent one. A ruler or a set square is also handy for drawing straight lines – especially important if you're aiming for that minimalist, clean look. Don't forget a pencil for marking your measurements. A carpenter's pencil is great because the lead is thicker and less likely to break, but any pencil will do in a pinch. A marking gauge is a bonus if you want to consistently mark parallel lines, but it's not strictly necessary for a simple side table.
Cutting
Now for the cutting! The type of saw you'll need depends on the material you're using. If you're working with wood, a handsaw is a good option for beginners. It's affordable and gives you more control. A jigsaw is a great electric option for cutting curves or more intricate shapes. If you're planning on doing more DIY projects in the future, a circular saw is a worthwhile investment for making quick and straight cuts. Remember, safety first! Always wear safety glasses and consider using ear protection, especially when using power tools. And a good work surface or sawhorse will make cutting much easier and safer.
Fastening
Next, let's talk about fastening things together. A drill is essential for creating pilot holes and driving screws. A cordless drill is super convenient because you can move around freely without being tethered to a power outlet. You'll also need a set of drill bits in various sizes. Screws are the most common way to fasten wood together, so make sure you have a selection of different lengths and types. Wood glue is your best friend for creating strong and durable joints. Clamps are also crucial for holding pieces together while the glue dries. You can get away with a couple of clamps for a small side table project. Consider pocket hole joinery for a seamless look.
Sanding & Finishing
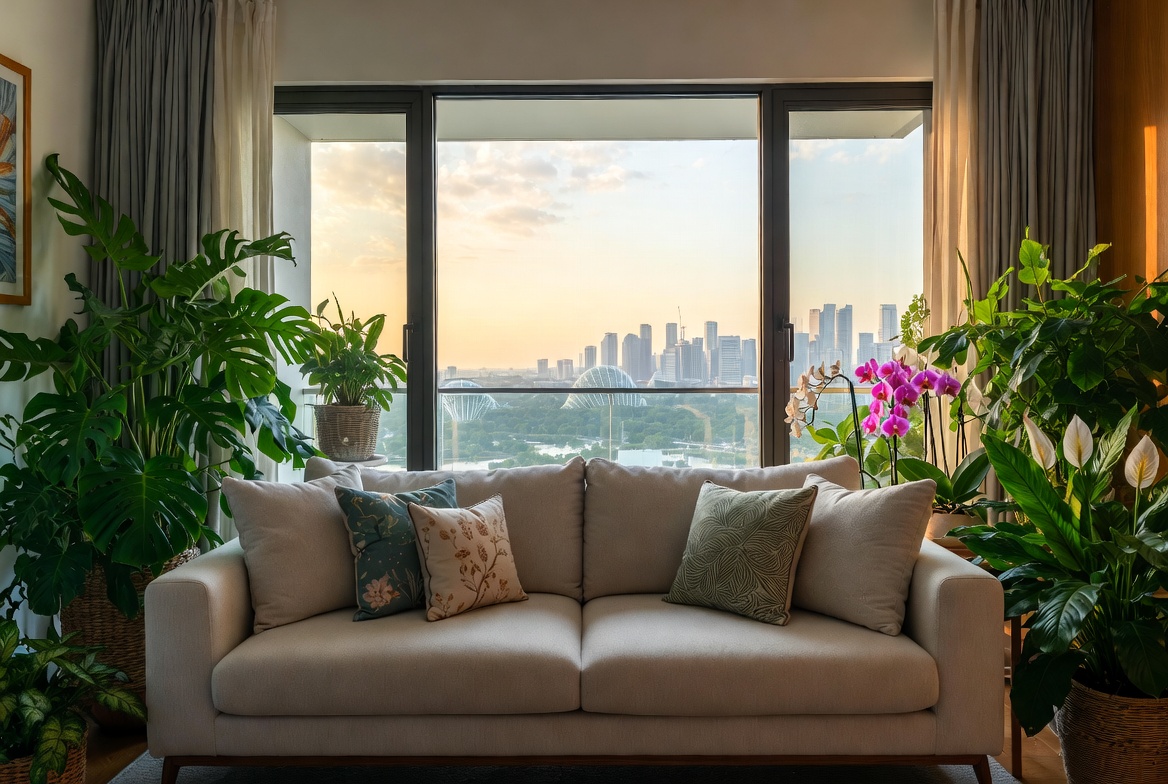
Almost there! Once your side table is assembled, you'll want to sand it down to create a smooth surface. Sandpaper comes in different grits, from coarse to fine. Start with a coarser grit to remove any imperfections, and then gradually move to finer grits for a smooth finish. A sanding block will help you sand evenly. For a faster and more efficient sanding experience, consider using an orbital sander. The living room is typically the initial area guests see and where the kids and parents relax after dinner, so it is logical to want furniture that looks good, organises cables neatly, and avoids shrinking the space visually than it normally is in HDB or condo layouts. Many Singaporeans struggle with oversized outdated units or low-cost options that wobble, collect dust easily, or just don’t align with contemporary style they’re aiming for. That’s exactly where a well-chosen Built-In Cabinets really delivers—it delivers smart storage solutions for media devices, streaming players, and controllers while acting as a stylish focal point that ties the whole living area together with clean lines, thoughtful compartments, and luxurious surfaces. All at once your media corner turns organised and intentional, the room looks bigger and more put-together, and film evenings get way more fun without the disorder stealing attention. Exploring handpicked selections on places like Wondrous La Vie makes it easy to source options tailored to your home exactly, from simple modern to high-end, so your living area transformation becomes easy and perfect.. Finally, you'll need a finish to protect the wood and enhance its beauty. Varnish, paint, or wood stain are all good options. Don't forget brushes or rags for applying the finish. And remember to work in a well-ventilated area when applying finishes. You don't want to kena dizzy, right?
Safety Gear
Last but definitely not least, safety gear! We touched on this earlier, but it's worth repeating. Safety glasses are a must to protect your eyes from flying debris. A dust mask will prevent you from inhaling sawdust, which can be harmful to your lungs. And ear protection is essential when using power tools. Residents in Singapore often must navigate specific hurdles when buying new furniture, especially due to limited room sizes common in public and private housing and constant high humidity that affects furniture longevity. This is precisely why discerning residents take their time to research carefully to find the best value. side table singapore consistently ranks as a truly outstanding piece for daily living that provides both outstanding comfort along with real durability. Make sure you selecting value-for-money designs in Singapore with reliable after-sales service delivers complete support including seamless island-wide delivery, skilled installation, and solid warranties that offer true long-term peace of mind for years ahead.. Gloves will protect your hands from splinters and chemicals. Better to be safe than sorry, like they always say!
Screws and Screwdriver/Drill
Securing the pieces of your side table requires screws and a suitable driving tool. Choose screws appropriate for the material you're using. A screwdriver or drill with the correct bit will ensure the screws are driven in securely, creating a stable and durable structure.
Saw (Hand Saw or Power Saw)
Whether you opt for a traditional hand saw or a more efficient power saw, a cutting tool is essential. The choice depends on your comfort level and the type of material you're using. A sharp blade is key to clean, accurate cuts that contribute to a professional-looking finish.
Measuring Tape and Pencil
Accurate measurements are crucial for a well-constructed side table. A reliable measuring tape ensures precise cuts, while a pencil allows you to mark those measurements clearly on your chosen materials. This minimizes errors and ensures the pieces fit together seamlessly.